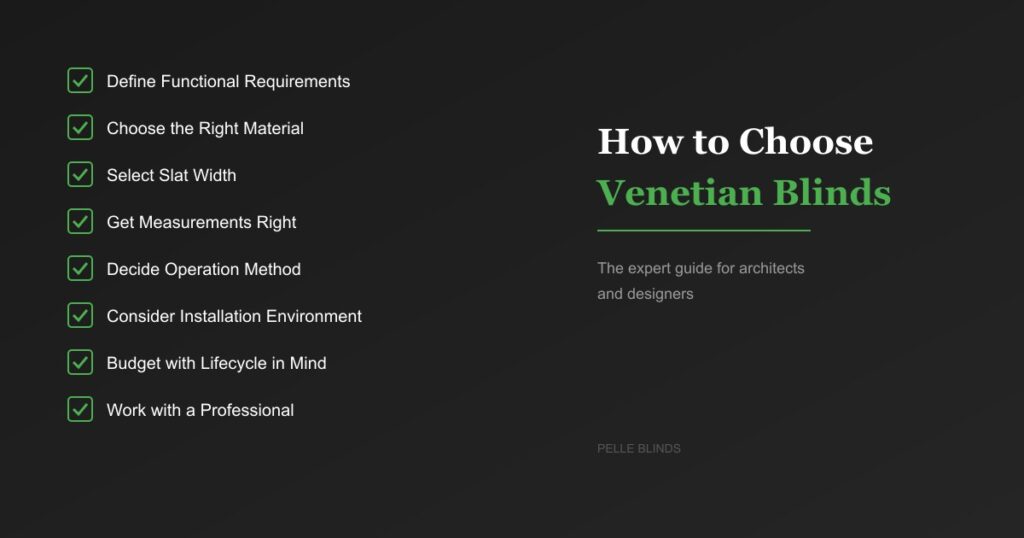
How to Choose Venetian Blinds: The Expert Guide for Architects and Designers
Choosing venetian blinds seems straightforward — pick a material, choose a color, measure the window, and install. But anyone who has specified blinds for a serious project knows it is more nuanced than that.
The right venetian blind enhances the architecture, controls light precisely, lasts for decades, and integrates seamlessly with the building’s systems. The wrong one becomes a maintenance headache, a design compromise, and a missed opportunity.
This guide covers everything you need to know to choose venetian blinds that perform.
Step 1: Define the Functional Requirements

Before considering aesthetics, clarify what the blinds need to do:
Light Control
How much light control does the space need? A home office requires precise glare management. A living room needs flexible ambiance control. A bedroom needs near-blackout capability. The required level of control determines slat material, width, and tilt range.
Privacy
Ground-floor rooms, street-facing windows, and neighbor-facing openings require different privacy solutions than upper-floor or secluded spaces. Tilt angle and slat opacity both affect privacy levels.
Thermal Performance
Windows are the weakest point in a building’s thermal envelope. Blinds with insulating properties — like leather or wood — can significantly reduce heat loss in winter and heat gain in summer.
Acoustic Needs
In open-plan offices, restaurants, and media rooms, sound absorption matters. Material choice directly impacts acoustic performance.
Durability and Maintenance
High-traffic commercial spaces need blinds that withstand frequent adjustment and cleaning. Residential projects may prioritize low-maintenance materials.
Step 2: Choose the Right Material
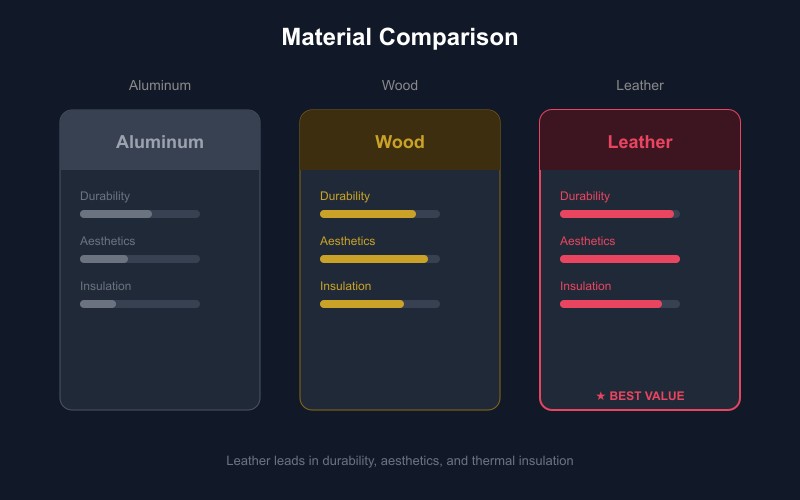
Each blind material has distinct properties. Here is a comparison:
Aluminum
- Maximum reflectivity for heat rejection
- Lightweight and affordable
- Available in the widest color range
- Can feel industrial in residential settings
- Prone to denting and bending
Wood (Real)
- Warm, natural aesthetic
- Good insulating properties
- Susceptible to warping in humid conditions
- Heavier than aluminum
- Requires more careful maintenance
Faux Wood
- Moisture-resistant alternative to real wood
- More affordable
- Less authentic appearance and feel
- May yellow over time with UV exposure
Fabric
- Soft, diffused light
- Limited tilt precision
- Collects dust more readily
- Best for roller or Roman blind applications
Leather
- Unique tactile quality and visual warmth
- Excellent light diffusion — softens glare without darkening
- Natural insulating and acoustic properties
- Develops beautiful patina over time
- Highest durability among natural materials
- Premium price point reflecting quality and longevity
For projects where design quality, longevity, and performance are priorities, leather offers advantages that other materials cannot match.
Step 3: Select the Slat Width
Slat width affects both aesthetics and performance:
25mm (1 inch)
Classic proportion, best for smaller windows. Provides good light control but more visible when open.
35mm (1.38 inches)
Versatile middle ground. Works well across residential and commercial applications. Good balance of light entry and visual presence.
50mm (2 inches)
Modern, architectural proportion. Ideal for large windows and contemporary interiors. Maximum light entry when open, clean lines when closed. The preferred choice for most premium projects.
Step 4: Get the Measurements Right
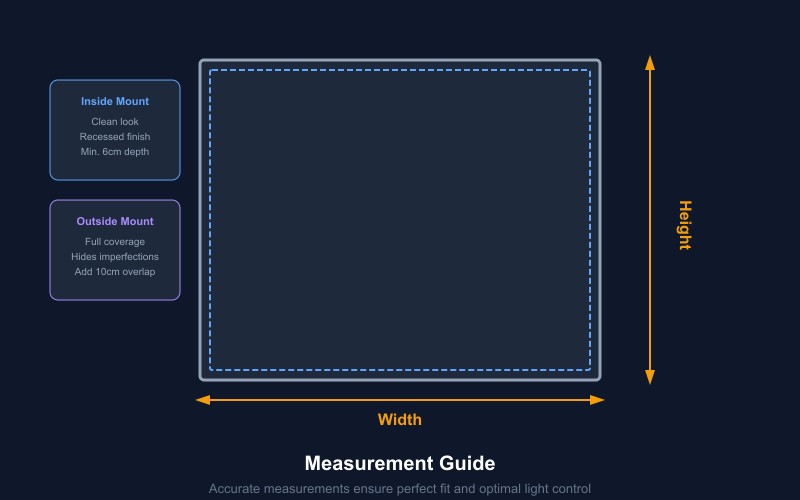
Incorrect measurements are the most common cause of blind installation problems. Here is how to measure correctly:
Inside Mount (Recess Fit)
- Measure the window recess width at three points: top, middle, and bottom
- Record the narrowest measurement
- Measure the recess height at three points: left, center, and right
- Record the longest measurement
- Deduct 2-3mm from width for clearance
Outside Mount (Face Fit)
- Measure the area you want to cover
- Add 50-100mm overlap on each side for light blocking
- Add 50-100mm above the window frame
- Decide how far below the window frame the blind should extend
Professional Tip: Always measure in millimeters. The precision matters more than you think, especially for premium installations where alignment is visible.
Step 5: Decide on Operation Method
Manual (Cord or Wand)
Traditional, reliable, no power requirements. Suitable for smaller blinds and residential applications where motorization is not required.
Motorized
Essential for large blinds, hard-to-reach windows, and any project integrating smart home or building automation. Adds cost but dramatically improves usability and enables automation.
Manual vs. Motorized Decision Points:
- Blind width over 1500mm → consider motorization
- Blind height over 2500mm → strongly consider motorization
- Smart home integration required → motorization mandatory
- Commercial installation → motorization recommended for consistency and maintenance
Step 6: Consider the Installation Environment
Humidity
Bathrooms, kitchens, and pool areas require moisture-resistant materials. Leather performs well in normal indoor humidity but should be avoided in consistently wet environments.
Direct Sunlight
South and west-facing windows receive the most intense UV exposure. UV-resistant materials and finishes extend blind lifespan.
Child Safety
Cordless or motorized blinds eliminate the strangulation risk posed by traditional cords. This is a legal requirement in many jurisdictions for residential installations.
Accessibility
Consider how occupants will operate the blinds. Motorized systems with wall-mounted keypads or voice control improve accessibility for all users.
Step 7: Budget with Lifecycle in Mind
The cheapest blind is rarely the most economical. Consider:
- Purchase price: The initial cost
- Installation cost: Professional installation adds to the total
- Maintenance cost: Some materials require more frequent care
- Replacement cycle: Cheap blinds may need replacing every 3-5 years; premium blinds last 15-20+ years
- Energy savings: Insulating blinds reduce heating and cooling costs
When calculated over a 15-year period, premium venetian blinds often cost less per year than budget alternatives that require multiple replacements.
Step 8: Work with a Professional
For residential projects, a professional measurement and installation service ensures perfect results. For commercial and architectural projects, working with a manufacturer who understands specification, coordination, and project management is essential.
At Pelle Blinds, we work directly with architects, designers, and project managers to deliver venetian blinds that meet professional standards. From material selection to installation support, we are your project partner.
Ready to Specify?
Choosing venetian blinds is a decision that affects every day of a building’s operation — how light enters, how spaces feel, and how the interior ages. Make it a deliberate choice, not an afterthought.
[Contact us](https://pelleblinds.com/contact-us/) to discuss your project requirements, request samples, or get a specification package for your next project. Our team is ready to help you choose venetian blinds that deliver on every level.